Last Ray

I had quite an interesting dialog with my seven year old son about this photo.

Adrian: Dad how did you get to capture the last ray of the Sun on the flowers.

Me: It is not a sun ray. I used flashlight to highlight the flowers as if the Sun was lighting them up.

Adrian: Cheater. It is not a real landscape. Nobody is going to buy it. People like real landscapes.

Beauty is in Details

I’m still experimenting with this technique of multiple exposures over long period of time combined in one image and I like  results better and better. I think I’m onto something. Look at this image. Pretty trivial and  obvious composition. The first thing to note is that clouds look like they are painted.

Then I looked closely at different elements in the image and liked this technique even more. Here is a fragment of a field on the right:

And here is the tree enlarged:

Both elements look like painted. The road is the only element that remains looking as a photograph. This combination of photographic look and painting look creates quite an interesting effect. I’m eager to start printing this to see how it looks in full detail print.

Studying Time

I’ve been studying time in photography, experimenting with different things for over a year. How to capture time in one image? What if images from multiple times are combined into one? What’s behavior of different moving subjects over time? This requires a lot of patience (which to be honest I’m lacking) keeping camera in exactly one position recording world around it at it changes.

The best part of it is a suspense waiting for images to be processed and see the end result. The worst part is not knowing if any of it will be any good.

So far I have had lots of ideas with little success. Finally, it starts yielding some interesting results. Look at those clouds: don’t you like the painting like look of them? That’s no painting though. It is a lot of images taken over time with camera stationary in the same place on a tripod. Good thing there were no cars on this rural road that gave me enough time to make it.

Snow in the Palouse: Steptoe Butte

The whole area has frozen. My car was the only one on the roads making a new track in fresh snow. After driving around at the bottom of a fog ocean I drove to the top of Steptoe butte. As I were reaching the top I emerged from fog. The whole landscape opened up to my view: it was an  endless sea of clouds with peaks of mountains like islands seen on horizon.

I was overwhelmed by the beauty of it all. Snow sparkling in the sun. Roads disappearing in the fog. Pristine white fields in small openings of white fog.

It was just too much beauty around my senses were exhausted. I was taking photos seemingly random, on instinct. I need it a rest.

Back from the top I dove my submarine back into the ocean of fog. Bitter cold but happy.

Snow in the Palouse: White Out

The next morning I woke up early to photograph sunrise. I had a place and scene in mind. Except as always the Nature has its own plans. Everything was still covered in thick fog. it make everything feel more enclosed putting white wall around. Everything was white, fresh and clean: snow on the ground and fog in the air.

There was no hint of sunrise. The fog was too deep for that. So I started to photograph snow in the Palouse in fog. As I was going thru the day my image became more and more abstract and the theme has become clearer: white out.

The whole area looked frozen and deserted. My car was the only one on the roads making a new track in fresh snow.

White out – the land is white and the sky is white. There is only thin line where land meets the sky. And nothing disturbs the quiet stillness of it all.

Where land meets the sky

Where land meets the sky

Where land meets the sky

ETTR or Try it before you buy it

There has been a lot of discussion of ETTR (Expose To The Right) on photographic blogs, websites and all kind of other publications. With this method you expose as high as possible with histogram touching the right edge. Here is one article that goes in depth on this method: http://www.luminous-landscape.com/tutorials/expose-right.shtml.

The idea is that this produces maximum quality digital negative. Often this produces image that looks overexposed and later in post-production supposedly you can lower exposure to get naturally looking image but with higher quality.

While it looks reasonable that this may reduce signal-to-noise ratio, I noticed that this results in images looking too flat and with washed out colors. On my last trip I took two images one normally exposed and one exposed to the right. The scene is extremely simple which helps illustrate the difference in result. In post-production I reduced exposure of the ETTR image to match exposure of the first image. No other adjustments were done to either image. Here are results side-by-side:

_MG_4863 _MG_4864

Guess which one is which? The one on the left is taken with normal exposure, the one on the right is taken with ETTR and then reduced back exposure to match exposure of the first image. As you can see ETTR image results in less color and less contrast, i.e. lower dynamic range. To confirm this here are the corresponding histograms:

_mg_4863 _mg_4864

Just by looking at histograms you can see that the range of tonality is greater in normally exposed image as well as greater separation of colors. This seems to disprove the statement that the article I linked at the beginning does that ETTR image has greater dynamic range.

I don’t know about you by I’d rather expose right than expose to the right. This is just another case to demonstrate my main principle in photography: do what you like, what feels right to you. And no matter how convincing a new idea you read somewhere sounds, try it before using it, get your own feeling for it. If you really like it, use it, just make sure it is because you got your own understanding of it not because someone else told you to do it.

UPDATE: I’ve got requests to include original ETTR image with histogram. Here it goes.

_MG_4864

Capture

Happy Halloween

I took this photo in the Palouse back in August this year but was holding it back to use it to wish everyone a happy Halloween. Enjoy this image of an abandoned house on one very stormy summer night. It looks very much like a haunted house.

_MG_5089

Imaginary Worlds

I’m not sure where I picked this up but I was stuck with a thought that Photoshop is bad for photography. as a landscape photographer I should use as little of it as possible. It dawn on me that I was holding myself back from what I craved for a long time. I wanted to create landscapes from my imaginations. I always envied artists who could draw what they saw in their minds, not what they saw with their eyes. So, this summer I started working on a new project “Imaginary Worlds”. In this project I use multiple images to combine into one. I don’t limit my creativity.

The first of the series was in my post a month ago: From Real into Surreal. Though I was not yet conscious at that point about why I was attracted to it and where it was going. This image is the first one where I was consciously working on it as a new project. (click on it to see larger size)

_MG_3969

From Real into Surreal

“The thing’s hollow – it goes on forever – and – oh my God – it’s full of stars!” – Arthur C Clarke “2001: A Space Odyssey”

When I was a kid I loved science and I loved science fiction, not the kind with goblins, demons and fairy tale creatures but the kind about interstellar voyage and discovery, distant stars and worlds around them.

One of those stories that I remember particularly well was about a world with three suns, a world where darkness had no place, a world without stars, with intelligent race who believed there is only small space around them, that they are alone in the Universe. Every so often a global cataclysm was sweeping thru the planet as all three suns where aligning and giving a gift or curse of night with all the stars in the sky. Every adult on the planet would turn mad from the shock of realization that there were infinite number of worlds in the Universe, that they are not alone. What remember from the story the most is that feeling of shock and awe of seeing so many stars.

Now I’m a grown up man but I still love science fiction. How is it relevant to photography? What if we imagine a world where stars can be visible even during day…

***

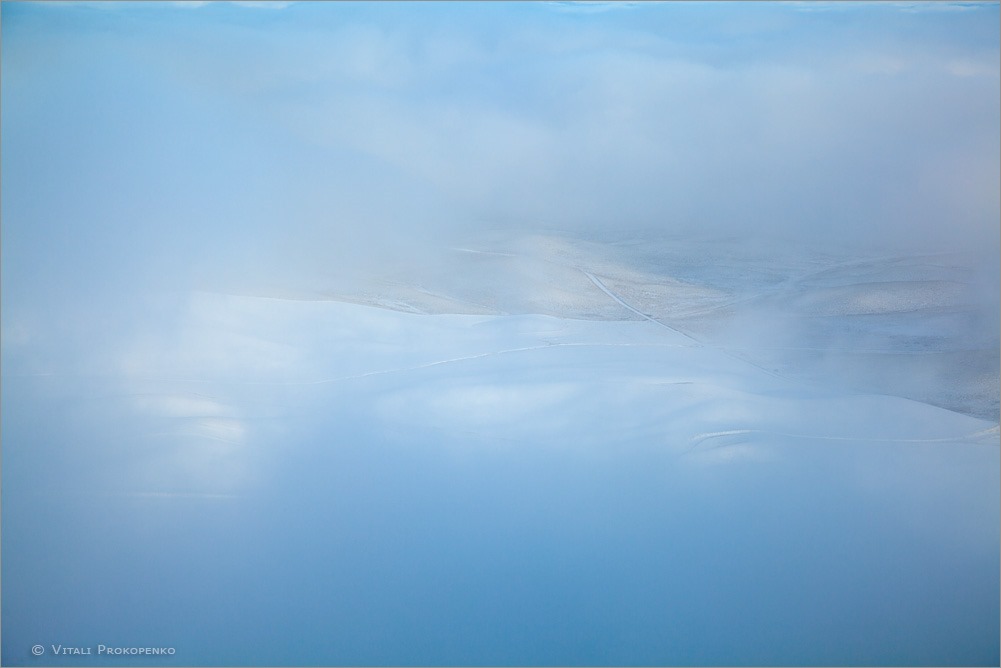
A while ago I published this photo from my trip to the Palouse: Taking Advantage of Imperfections. I like the photo. It has some surreal quality to it. But to me it was not finished yet or at least it was not what I intended for it.

I wanted to create an imaginary world where sun and stars can be seen at the same time. I took the same photo at night with intention to merge the two into one. When I did it it became even more surreal. At the same time I recognized that the pattern of stars from that view point was completely random. They were randomly filling the sky making it more interesting but not adding anything to the composition.

If only I had Milky Way spreading its wings around the Sun, along the sun rays extended by imperfection in my polarizer – that would be really interesting. So, on my recent trip to Rainier I photographed Milky Way positioning it within frame where I ‘d like to have it on the final image. Here is the end result the way I intended it. To me it looks even more surreal than before and at the same time somehow very harmonic.

_MG_3000

I’m interested in what you think about these to images?

Taking Advantage of Imperfections

I’m increasingly photographing with more and more challenging lighting. Such as including sun high in the sky into the picture. The creates a lot of glare in the photo. And I’m working thru those issues, finding how to avoid them or incorporate them in my pictures.

There is a couple methods I use to avoid glare in my pictures. First one that I used for a while already is to block out the Sun with a finger, take photos without the Sun and the glare. The next photo is with no fingers in the frame. Both photos should be taken with the same exposure, the same focus point, the same aperture and on tripod. I would take the normal photo as a base and then use the one where I blocked out the Sun to patch any areas with a glare. This methods works really well during sunset or sunrise when the Sun is placed closer to an edge of a frame.

The other method I discovered during my trip a week ago to the Palouse. Turns out that if I open aperture to its widest setting I get almost no glare or at least its impact becomes imperceptible. This method works well even if the Sun is in the middle of the frame. That’s the technique I used for the photo below that I took during the trip.

Again I would use the photo with aperture set to where I want it. In this case I wanted to close down aperture to get sun burst rays. Closing down the aperture produced a lot of glare in the sky, on the Steptoe Butte and in the fields, that would be hard to patch in Photoshop if I did not take another photo with open aperture and used parts of that photo to patch out all the glare.

Then I discovered that polarizer that I had on my lens had imperfection that resulted in light spilling further from the Sun in two directions along one line. (And just in case you did not know any additional glass surface adds more glare to the photo as sun light bounces back and forth between glass surfaces.) My first reaction was to remove the filter. But then I thought of incorporating that effect and make that line horizontal by rotating the filter. Later I also did take photos without the filter but I like the one with imperfection more. It gives some surreal feel to the scene.

_MG_3000